|
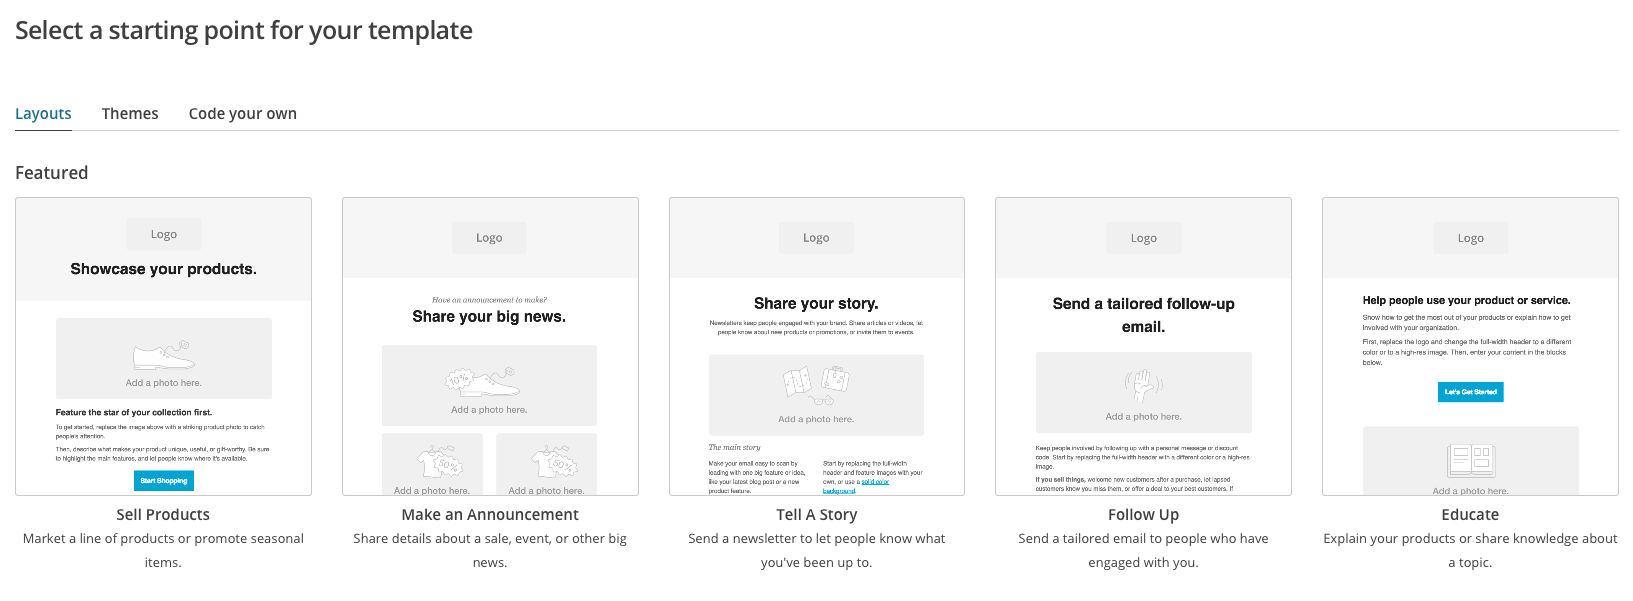
In the world of marketing for small business, I often get asked about e-newsletter campaigns. The best thing is, it is relatively easy and straight forward to put an e-newsletter together using online templates. There are various systems available such as Vision 6, Constant Contact, Mailchimp and more. While I have used all of those mentioned, I find Mailchimp is the easiest to set up and use. If you’d like to set up a Mailchimp account I have created a short video to talk you through it, so please follow the video to help you get started. However, if you would prefer to read along as well, below are the steps that we go through in the video. Also take a look at our blog on How to Create an Effective Mailchimp Newsletter. Step 1. Log in Visit www.mailchimp.com and create your account using your email address and a password. Step 2. Create a contact list Once you’ve logged in you will see the Mailchimp dashboard. Here you’ll see campaigns, templates, lists and reports across the top of your screen. The first thing to do is to create a list using your database of contacts. If you don’t have a database already you can add contacts individually. Give your list a name and add in details such as your default email, default from name and a reminder of how they signed up to the list. Step 3. Import your contacts You can import contacts by uploading a CSV or txt file, or you can copy and paste from an excel spreadsheet. Your list may contain as many details about each subscriber or contact as you like. However, it should at least contain their first name, last name and an email address. Any other information that you would like to include is entirely up to you. You can always add or delete people from your list at any stage. Plus, you can create a sign up form which you can embed into your website. Step 4. Create your template Now it’s time to get creative and create a branded template for your business. You will see a range of layouts and themes which you can select and use. Select your desired layout and start designing. You will need to drag and drop the images form your desktop that you wish to use. There are text boxes within the template, however you will see a range of options on the right-hand side of the screen, which is your control panel. You can drag and drop any of these blocks to help create your template. For example, you may like some boxed text, or you may wish to have a button to click to for further information. It’s all there, simply drag and drop and start playing to get the look you desire for the newsletter.
Step 6. Create your campaign
Now your contact list and template is complete it is time to create your first e-newsletter campaign. First of all, give your campaign a name, this name is only visible to you. However, the subject line should be catchy as this is what your subscribers or contacts will see. You can also add in some preview text which is a sneak peek about what’s in the e-newsletter. Plus, you have an option to add in emoji’s just for fun ☺️. Tick to personalise the ‘to field’, that way you can set up the e-newsletter to say the name of your subscriber. Now select the template you've created from your saved templates and start modifying it to suit the campaign. Once you’re happy with the newsletter you can preview and test it and see how it looks on the desktop and on the mobile. Be sure to send yourself and a colleague the newsletter to make sure there are no spelling mistakes. When it’s all good to go, hit next and either send or schedule the campaign. Make sure all the details are correct before you his send. Or if you’d like to send later, select schedule and set the e-newsletter to go out at a later date and time. That’s a quick overview which will help you to get started. If you would like any more information or additional detail about setting up a MailChimp account and creating a campaign, please don’t hesitate to get in touch. I’m happy to conduct one on one or group tutorials, or Skype/Facetime sessions. Please email me at [email protected]. |
AuthorNicola Symons Archives
September 2019
|
|
CALL US
0407 642 995 |
|


 RSS Feed
